Silicone gasket compression design is the process of defining how a gasket will deform inside an assembled joint so that it maintains a continuous seal without excessive loading, displacement, or damage. Reliable sealing depends on more than the gasket material: free thickness, assembled gap, housing stiffness, fastener layout, surface condition, and service exposure all affect the result.
A silicone gasket can meet its drawing requirements and still leak after installation. For engineering teams specifying custom silicone rubber parts, the key is to evaluate the gasket and mating hardware as one system. This guide explains how to calculate squeeze, review tolerance extremes, control assembly loading, and develop a validation plan for a static enclosure seal. It focuses on solid molded silicone gaskets rather than silicone sponge or foam, which require their own load-deflection data.
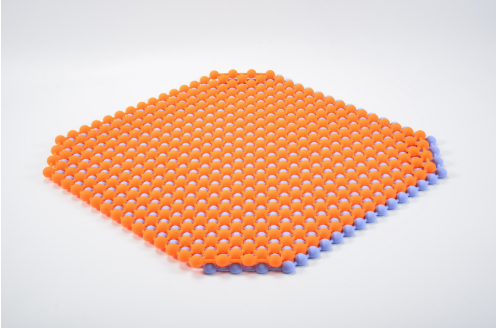
A material data sheet describes the behavior of a compound under specified test conditions. It does not establish that a particular gasket will seal a particular enclosure. Hardness, tensile strength, elongation, and compression set are useful inputs, but the installed gasket must also develop sufficient contact around the entire sealing path. A local gap, twisted section, damaged corner, or displaced sealing bead may create a leakage route even when the compound is suitable for the operating environment.
Part inspection can confirm thickness, profile, appearance, and other agreed characteristics. However, it cannot independently prove that the housing is flat enough, that fasteners distribute load adequately, or that the assembly procedure produces repeatable compression. When leakage appears only after installation, the investigation should include both the gasket and the joint. Rejecting the rubber component without checking the assembled gap can overlook the actual cause and lead to repeated tooling or material changes that do not resolve the problem.
Begin with a written sealing requirement. Identify what must be kept out or contained: splash water, dust, air, another gas, or a process fluid. Define the relevant pressure difference, temperature range, exposure duration, installation orientation, and expected service life. The requirement should also describe whether the enclosure experiences vibration, thermal cycling, cleaning chemicals, or mechanical handling. These conditions influence both material selection and the amount of compression that must remain available throughout service.
An enclosure that remains closed for its entire life presents different challenges from a cover opened during maintenance. Repeated opening introduces risks such as gasket stretching, contamination, incorrect repositioning, and damage during removal. A retained gasket may improve assembly consistency, but retention features must not prevent the sealing section from deforming as intended. If reuse is required, establish a service procedure and verify performance after representative opening and closing cycles rather than assuming that first-assembly results will persist.
“Waterproof” or “airtight” is not a complete engineering acceptance criterion. State the test medium, pressure or exposure condition, duration, equipment, and pass/fail limit. A pressure-decay test, immersion evaluation, and spray exposure test answer different questions and should not be treated as interchangeable. If a product requires an ingress-protection rating, evaluate the complete assembly under the applicable test requirements. Supplying a silicone gasket does not, by itself, establish the rating of the finished enclosure.
For a simple flat gasket compressed between approximately parallel faces, squeeze can be expressed as the reduction in thickness divided by the free thickness. Let t represent the uncompressed gasket thickness and g represent the assembled sealing gap. The calculation below describes geometric compression; it does not predict sealing force, leakage, or long-term durability. For hollow profiles, shaped beads, and other specialized sections, a more detailed geometry and load-deflection assessment may be necessary.
Gasket squeeze (%) = [(t − g) / t] × 100
For example, a gasket with a free thickness of 2.00 mm installed in a 1.50 mm gap has a nominal geometric squeeze of 25%. This is a calculation example, not a universal design recommendation. The acceptable compression range must be established for the selected compound, cross-section, confinement, surface condition, operating environment, and validation requirements. A percentage taken from an O-ring, foam, or unrelated gasket design should not automatically be applied to a solid molded silicone enclosure seal.
Nominal dimensions describe only one possible assembly. Minimum squeeze generally occurs when the gasket is at its minimum thickness and the joint is at its maximum gap. Maximum squeeze generally occurs when the gasket is at its maximum thickness and the joint is at its minimum gap. Reviewing these combinations reveals whether manufacturing variation can create under-compression or excessive compression. The tolerance analysis should include the relevant mating components, not just the rubber part.
Minimum squeeze (%) = [(tmin − gmax) / tmin] × 100
Maximum squeeze (%) = [(tmax − gmin) / tmax] × 100
The sealing gap may vary around the perimeter because of housing flatness, cover warpage, mounting features, or deflection during tightening. Consequently, one nominal gap dimension may not describe the actual installed condition. Review the local maximum and minimum gap along the seal path, particularly between fasteners and near corners. Avoid double counting a variation already included in another tolerance term. Where deformation depends on assembly loading, calculations, simulation, or physical measurement may be needed to establish realistic gap limits.
A gasket requires force to compress, and the enclosure must carry that force. A flexible cover can bend between screws, producing high compression near fasteners and lower compression elsewhere. Adding torque may increase this difference rather than create a uniform seal. Fastener spacing, flange width, cover stiffness, and gasket load-deflection behavior should therefore be considered together. The design objective is consistent contact along the seal path, not simply a high clamp load at individual fastening points.
Compression stops or other positive closing features can limit travel and make the assembled gap less dependent on operator tightening. Their position, height, and tolerance must be included in the joint analysis. Stops do not automatically eliminate cover bending, local flatness problems, or inadequate compression between fastening points. They also do not remove the need to check fastener strength and housing durability. The gasket should reach its intended working condition while the surrounding structure remains capable of supporting the associated loads.
The assembly method is part of the sealing design. Define how the gasket is positioned, how the cover is aligned, and how fasteners are tightened. For a multi-fastener joint, a controlled sequence may help reduce uneven closure. However, torque alone is not a direct measurement of gasket compression because friction and joint behavior affect the relationship between torque and clamp load. Validate the procedure using representative hardware, then document the settings, sequence, and checks needed to reproduce the approved assembly.
| Design Variable | Potential Effect | Recommended Evaluation |
|---|---|---|
| Gasket thickness and tolerance | Changes minimum and maximum squeeze | Calculate tolerance extremes and agree on a repeatable thickness measurement method |
| Assembled sealing gap | Controls geometric compression | Review hardware tolerances and measure representative assembled joints |
| Housing stiffness and flatness | Creates local variation in contact and compression | Assess deformation and identify weak locations around the perimeter |
| Fastener layout and closing features | Affects load distribution and assembly repeatability | Validate fastening sequence, closing travel, and local gaps |
| Gasket cross-section and confinement | Affects deformation, load, and available space for material displacement | Review the profile and groove geometry with compound-specific information |
| Parting line and trimmed flash | May disturb a critical sealing surface | Define permitted locations and acceptance limits before tooling |
| Temperature, media, and aging | May change material response and joint geometry | Test the complete assembly under representative service conditions |
A sealing path must remain continuous through corners, mounting areas, and any transitions in the gasket profile. Abrupt geometry changes can produce local differences in deformation or assembly behavior. A joined gasket introduces an additional interface that must be evaluated, while a one-piece molded design can avoid that particular joint but still requires control of geometry and manufacture. Check that the cross-section remains functional throughout the perimeter and that nearby features do not interrupt contact with the mating surfaces.
Retention tabs, locating features, or a suitable groove can help prevent the gasket from moving during assembly. Their purpose is to establish position without unintentionally stretching, twisting, or restraining the sealing section. A tight groove can alter how the material deforms, so the available space should be reviewed rather than minimized indiscriminately. Where an adhesive is used for positioning, evaluate its compatibility, thickness, placement, and service exposure. Unless specifically designed and tested otherwise, positioning adhesive should not be assumed to provide the seal.
For silicone rubber molded parts, parting-line location should be discussed before tooling manufacture. A raised line, residual flash, or trimming damage on a critical sealing surface may influence local contact. Acceptance criteria should distinguish between nonfunctional outer edges and surfaces that form the leak barrier. A blanket instruction such as “no flash” can be difficult to interpret consistently. Instead, identify critical areas on the drawing and agree on the permitted condition, trimming method, and inspection approach.
Hardness is important, but it is not a substitute for compound-specific compression behavior. Two silicone grades with the same nominal hardness may differ in other properties relevant to sealing. A softer material may conform more readily to a surface, yet it cannot reliably compensate for an uncontrolled gap or weak cover. Similarly, increasing hardness may change closing force without resolving uneven loading. Material selection and hardware design should be evaluated together rather than used as separate corrective actions.
For background on hardness, environmental exposure, and compression set, see the material selection and sealing performance guide. Use that information to identify candidate compounds, then confirm their performance in the intended geometry and application. Compression set data can support screening, but a laboratory material result does not directly predict leakage in every enclosure. The complete system still requires appropriate testing.
A useful validation plan identifies the test purpose, method, assembly configuration, exposure condition, and measurable acceptance criterion. Record the gasket revision, compound, hardware revision, and assembly procedure used for each test. Where pressure-based methods are selected, consider equipment capability, fixture sealing, stabilization conditions, and the effect of temperature on the result. Establishing a repeatable test method is necessary before comparing alternative designs; otherwise, apparent improvements may reflect test variation rather than better sealing.
First-assembly performance establishes an initial condition, not lifetime reliability. Depending on the application, further evaluation may include thermal cycling, exposure to relevant fluids, vibration, sustained compression, and repeated opening. Select conditions that represent the intended use and known risks. Avoid treating an accelerated test as an exact service-life prediction without a justified correlation. After exposure, inspect the gasket and hardware, repeat the sealing test, and document any change in geometry, damage, or assembly behavior.
When a design fails, change one controlled factor at a time where practical. Compare local gaps, gasket position, surface condition, and assembly results before changing the compound. If leakage repeatedly occurs between screws, housing deflection may deserve attention. If it occurs after chemical exposure, material compatibility becomes a stronger concern. These are investigation directions, not automatic diagnoses. A useful validation program produces evidence that distinguishes competing explanations rather than selecting the most convenient one.
Confirm the test method and reproduce the leak
↓
Identify the leak location and inspect the assembled joint
↓
Check gasket position, damage, and local sealing gap
↓
Review fastening, housing deflection, and tolerance extremes
↓
Evaluate material or environmental causes where evidence supports them
↓
Make a controlled change and repeat the relevant validation tests
This workflow prioritizes reproducibility and system-level checks. It should be adapted to the product rather than followed as a rigid sequence when there is clear evidence of another cause. Record unsuccessful changes as well as successful ones. If a particular correction removes leakage only at room temperature or only on one assembly, further testing is needed before the design is released.
The following example is hypothetical and illustrates the calculation method. It is not a NICE Rapid customer case or a recommended specification. Assume a solid silicone gasket has a nominal free thickness of 2.00 mm with a tolerance of ±0.10 mm. The assembled sealing gap is 1.50 mm with an evaluated variation of ±0.10 mm. For this simplified example, that gap variation already includes the relevant joint variation; additional flatness or deformation terms must not be added again unless they fall outside the stated gap limits.
| Condition | Gasket Thickness | Assembled Gap | Calculated Squeeze |
|---|---|---|---|
| Nominal | 2.00 mm | 1.50 mm | 25.0% |
| Minimum compression | 1.90 mm | 1.60 mm | 15.8% |
| Maximum compression | 2.10 mm | 1.40 mm | 33.3% |
The nominal squeeze is 25%, but the tolerance combinations create a much wider geometric range. These results do not establish whether the design passes or fails. The next step is to compare the range with an application- appropriate compression window supported by compound information and assembly testing. If the range is unsuitable, investigate whether the dominant contribution comes from gasket thickness, joint geometry, or structural deformation. Increasing nominal thickness alone could improve minimum compression while making maximum compression worse.
Possible revisions include improving control of the assembled gap, increasing cover stiffness, revising closing features, or agreeing on a more appropriate gasket thickness tolerance. Each option has manufacturing and cost implications. After selecting a revision, recalculate the extremes and test representative assemblies, including challenging tolerance conditions where practical. Verify that the closing force is acceptable and that compression remains sufficiently uniform around the perimeter. Approve the design only after the sealing and assembly requirements are demonstrated.
Because silicone is flexible, a thickness measurement can change with contact force, support, and measurement location. An apparently precise drawing tolerance is difficult to enforce if the supplier and customer use different methods. Agree on the free-state condition, measurement points, instrument or fixture, and relevant conditioning requirements. Where installed dimensions matter, identify them separately from free-state dimensions. Do not use an uncontrolled caliper reading as the sole basis for a critical seal calculation.
A separate guide will cover measuring silicone gasket thickness without deforming the part in more detail. For the current project, include the agreed measurement method in the inspection instructions so that tolerance analysis, sample approval, and production acceptance use a consistent definition.
When requesting silicone compression molding support for custom gaskets, provide more than a gasket model where possible. Mating-part information helps connect manufacturing requirements to the sealing function. NICE Rapid can review project information for custom silicone rubber components; the specific material, tooling, tolerance, and inspection scope should be confirmed for the individual design.
Prototype and low-volume silicone molding can provide parts for evaluating fit, assembly behavior, and sealing performance before a broader production commitment. However, smaller quantities do not remove the need for a clear specification. If the gasket design, material, hardware, or process changes after approval, assess whether the previous validation remains applicable. Maintain revision records so that the tested configuration can be connected to the parts subsequently manufactured.
There is no single percentage suitable for every silicone gasket. The working range depends on compound behavior, cross-section, confinement, mating surfaces, pressure, temperature, and service requirements. Establish a candidate range using relevant material and design information, check the minimum and maximum tolerance conditions, and validate the complete assembly. Do not transfer a foam or O-ring recommendation to a different gasket geometry without evaluation.
A softer compound may improve conformity in some designs, but it is not a reliable substitute for controlling the joint geometry. It may also change closing force, displacement, and durability. First determine how much the gap varies and why. Then evaluate material and structural changes together using the sealing and assembly requirements.
Possible causes include gasket displacement, contamination, damage, incorrect fastening, or changes in the gasket after service exposure. Check the removed gasket and both sealing faces, then reproduce the approved assembly procedure. If reuse is required, include opening and closing cycles in validation. A seal that works only on its first installation may not meet the product's maintenance requirements.
The permitted condition should be defined for the specific design. Flash or trimming damage on a critical contact surface may affect sealing, while a small residual condition on a nonfunctional outer edge may have little relevance. Mark critical surfaces and agree on acceptance criteria before tooling manufacture rather than relying on a general appearance instruction.
No. Gasket inspection verifies agreed part characteristics. Enclosure sealing also depends on housing geometry, assembly, other openings, and the specified exposure conditions. Validate the complete product using the applicable test method. Avoid treating a material designation or approved gasket sample as evidence that the assembled enclosure meets an ingress rating.
Review the need for revalidation when changes affect the sealing system, including gasket geometry, compound, hardware dimensions, fastening, surface treatment, or relevant manufacturing conditions. The test scope should reflect the impact and risk of the change. Preserve the approved baseline and document the evidence used to release the revised configuration.
The references below support the principles of tolerance analysis, compression loading, and system-level seal design. O-ring guidance provides useful background, but its geometry-specific dimensions and recommendations should not be applied directly to every flat silicone gasket.


